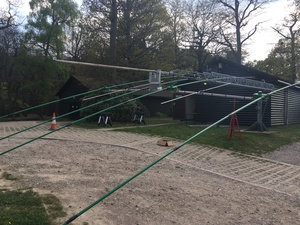
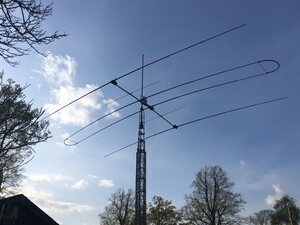
Having removed all the antennas from the Crawley ARC Versatower before we swapped the old BP60 for a heavy duty version we inspected the 3 element SteppIR with the 30/40m dipole option. It has been on the tower since 2009 with only minimal attention needed in that time; it was still working really well at the time of removal.
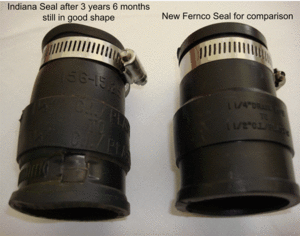
We had replaced the eight old Quick Disconnect (QD) boots between the Element Housing Units (EHU) and telescopic fibre glass Telescopic Element Tubes (TETs) about two years ago. These had perished fairly quickly despite being over wrapped with electrical tape. The newer version shipped by SteppIR are different to those originally supplied by SteppIR and it’s these Fernco 1 1/2 to 1 1/4 inch rubber joiners we used two years ago. They were nearly perfect with only a coating of green tree spores.
The same cannot be said of the TETs. Eight years of sun and weathering had caused some of the TETs to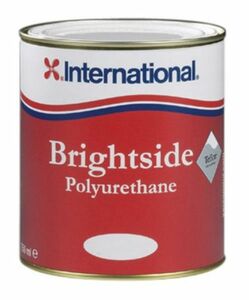 lose their paint completely. Of course this was on the upper surface and not easily visible from the ground. We elected to repaint all the TETs using marine high UV resistant polyurethane paint by International Marine.
Two coats of paint were needed for an excellent finish and a 750ml can was just enough to cover the eight TETs and for good measure the EHUs which had also shown some fading due to the effects of the strong UK sunshine! Of course the elements on our antenna are fully extended and locked. With the over-painting I doubt the TETs will ever retract again. Not a problem in our case,
Before painting the old silicon wrap supplied by SteppIR was removed as this was showing some degradation. The 3M PVC tape underneath was in excellent condition and was left in place. SteppIR now supply heat-shrink sleeve for weatherproofing these joints and with some foresight we would have bough some of this to replace the tape. For the time being we used conventional self-amalgamating tape over wrapped with PVC. The plan is to replace this with heat-shrink in due course.
You will need plenty of room to do this properly as the assembled boom is 17ft long and the TETs about 18ft long. Give yourself enough time, each coat on each element will take about 1 hours to apply.
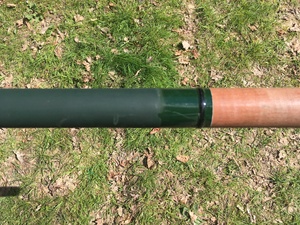
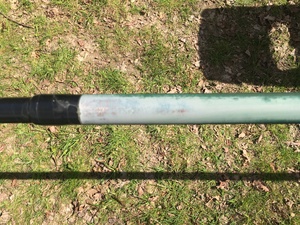
As well as painting the EHUs we also used PVC tape to wrap the element support tubes (ESTs) which are bare between the EHU and the QD. We also plan to get some new foam plugs for the end of the director and reflector plus some new end caps which were not supplied when we bough our antenna eight years ago.
One job we knew needed doing was replace the centre boom joiner which had bent slightly when we had a cable break on our old Versatower. The antenna dropped about 4 feet when the cable broke and very luckily the only damage was a droop at the centre of the boom. We bought 1 1/2inch diameter 1/4inch (~6.3mm) thick aluminium from Aluminium Warehouse . This is twice as thick as the original material supplied by SteppIR. The boom and joiners are precision drilled at manufacture and of course being American use imperial hardware throughout. The bolts are 1/4inch and the holes are not clearance drilled so don’t use 6.5mm as there will be play in the joint. We replaced all three joining sections and made the replacements slightly longer than the original adding two extra 6mm securing bolts to each joint, one each side and at 90deg offset to the original fixing. Belts and braces but worthwhile. This was done only one the EHUs were perfectly aligned and A4 stainless hardware was used throughout. On our version the thread of original 1/4inch bolts supplied were of slightly the wrong length and needed three washers on either side of the boom to make sure the joint was tight. I’m sure SteppIR have sorted this out by now but it’s worth noting if you’re servicing an older model. It was another reason to double up the bolts with extra 6mm hardware. Don’t forget the nyloc nuts and washers for the new fixings.
When building the antenna eight years ago I recall thinking that the chock block and weatherproofing tube wouldn’t stand the test of time. WRONG. The block was in perfect condition when removed. The joints were clean and dry. The only wear being discolouring to the top of the tube. We wrapped this in electrical tape before refitting to prevent further deterioration. It would be worth doing this from day 1 as tape is cheap.
One thing that has been improved is the 6m performance. Some years ago we had added the SteppIR 6m director making a 4 element beam. Unfortunately this never worked very well largely because the reflector was so far behind the driven element. Ian White, GM3SEK did some modelling of an improved design and came up with this http://www.ifwtech.co.uk/g3sek/vhfdx/gm3sek-steppir-6m.pdf. We bought a ready to go kit from Aerial Parts in the UK. This has dramatically improve the performance of the system.
To make life much easier we’ve bought and fitted a TowerMate rotating mast to boom bracket. This allows the antenna to be attached horizontally on the ground with the tower luffed. Once vertical the bracket locks in place as you can see in the two pictures. The assembly, fitting and raising was all done by one person working alone. Simple.
So the final result is very pleasing to look at as well as working just as well and on 6m better than ever, the first QSO was with Gabriel, EA6VQ via MS using MSK144. The QSO was completed in about a minute with every 15 second period giving workable pings.
